> ## Documentation Index
> Fetch the complete documentation index at: https://alexcode.ai/docs/llms.txt
> Use this file to discover all available pages before exploring further.
# Model Configuration
> Configure and customize AI models in Alex Sidebar
Alex Sidebar supports multiple AI models to suit different development needs and preferences. This guide explains the available models and how to configure them.
## Model Selection
You can switch between models in two ways:
### Model Selector Menu
1. Click on the default model on the bottom left corner of the chat input view
2. Select the model you want to use from the dropdown menu
### Keyboard Shortcut
Press `Command` + `/` to quickly cycle through your enabled models during a chat session.
## API Key Configuration
You can add your API keys directly in the Model Settings screen. Simply click the settings icon on the top right corner of the sidebar and look for the API key input fields for each provider under the section "Model Settings".
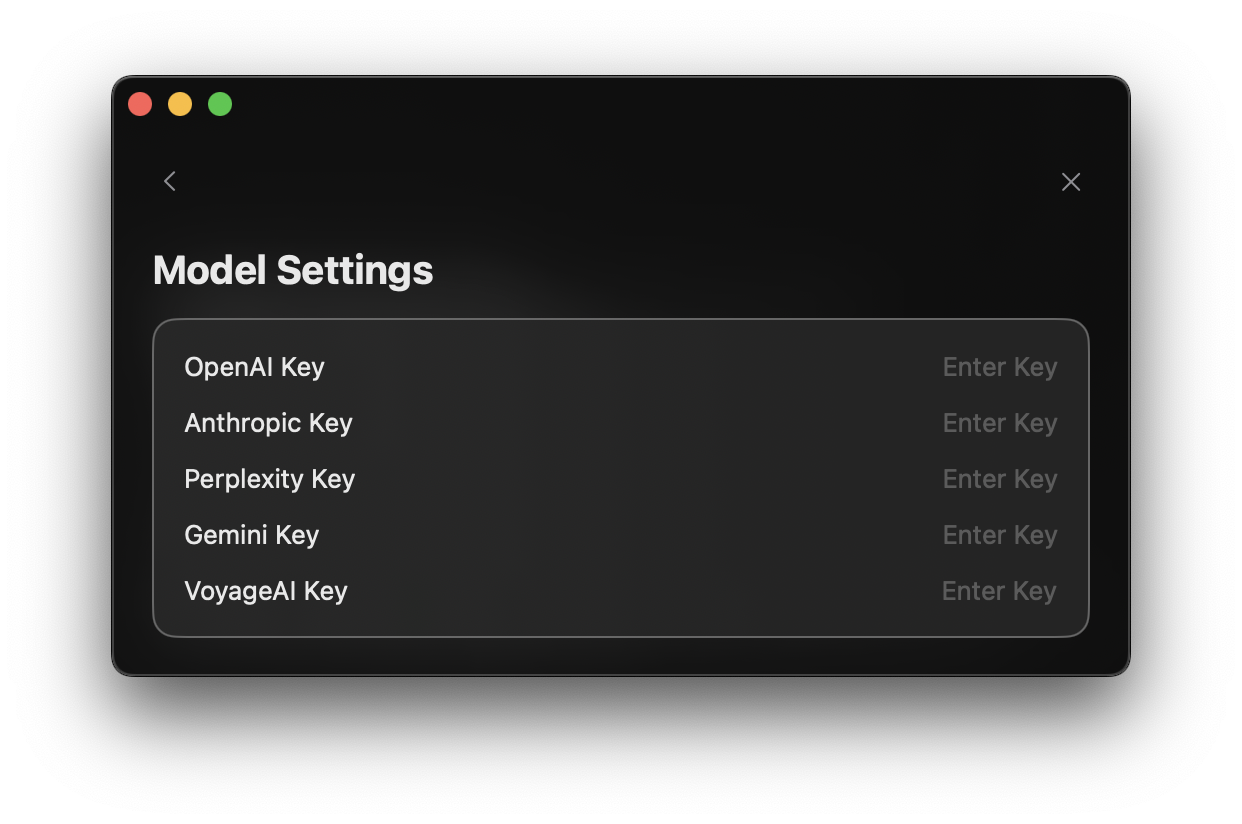 To use GPT-4 or OpenAI models:
1. Get an API key from [OpenAI's platform](https://platform.openai.com)
2. Find the "OpenAI Key" field
3. Enter your API key in the input box
To use Claude models: 1. Obtain an API key from [Anthropic's
console](https://console.anthropic.com) 3. Find the "Anthropic Key" field 4.
Enter your API key in the input box
Additional model providers like Perplexity and VoyageAI can also be configured:
1. Obtain the appropriate API key from the provider's website
2. Find the corresponding key field in settings
3. Enter your API key
Your API keys are stored securely and only used to authenticate with the
respective AI providers. You can update or remove them at any time from the
settings screen.
## Custom Model Setup
To use GPT-4 or OpenAI models:
1. Get an API key from [OpenAI's platform](https://platform.openai.com)
2. Find the "OpenAI Key" field
3. Enter your API key in the input box
To use Claude models: 1. Obtain an API key from [Anthropic's
console](https://console.anthropic.com) 3. Find the "Anthropic Key" field 4.
Enter your API key in the input box
Additional model providers like Perplexity and VoyageAI can also be configured:
1. Obtain the appropriate API key from the provider's website
2. Find the corresponding key field in settings
3. Enter your API key
Your API keys are stored securely and only used to authenticate with the
respective AI providers. You can update or remove them at any time from the
settings screen.
## Custom Model Setup
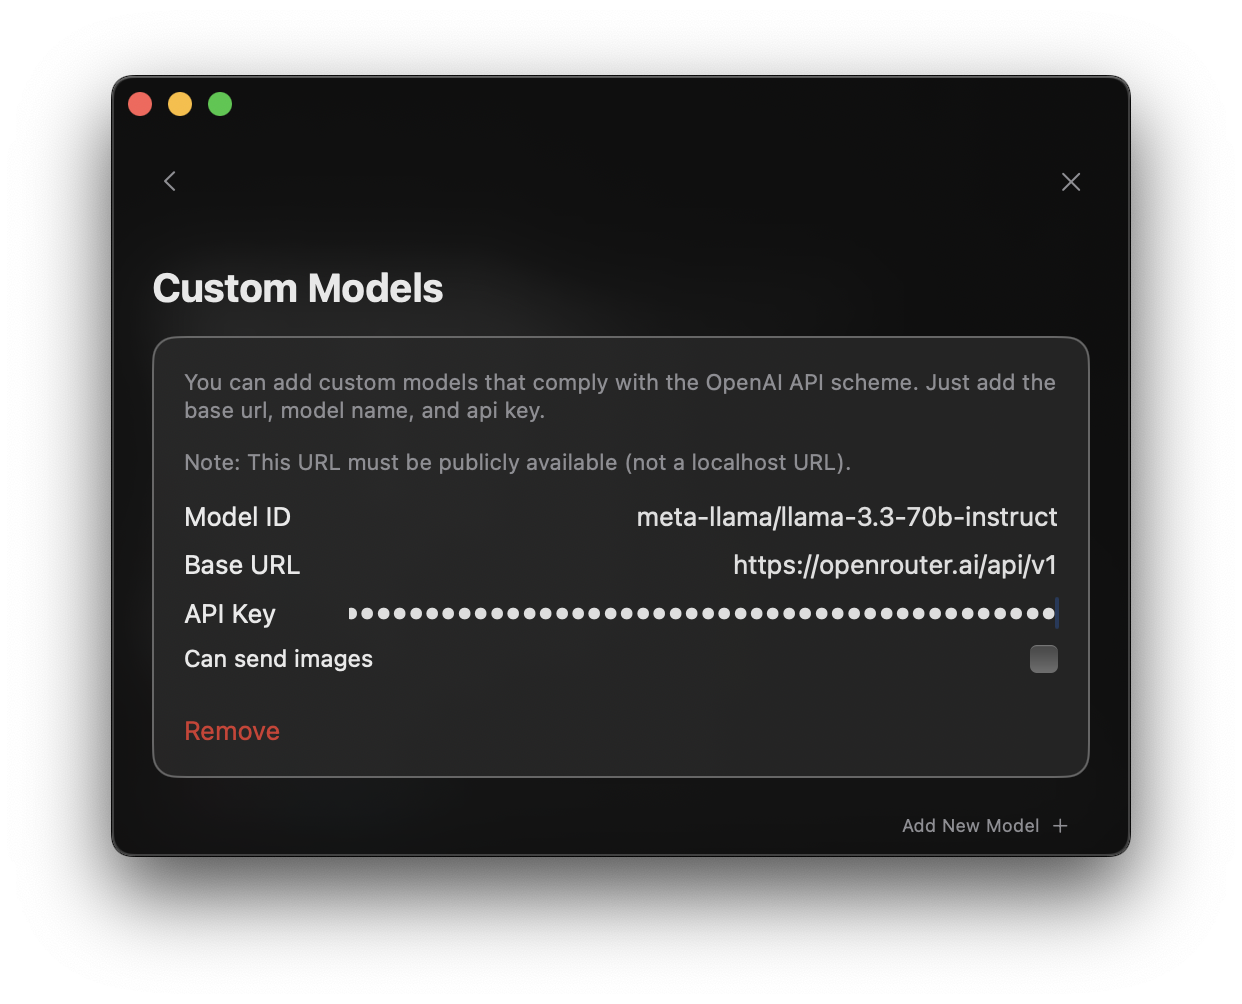 You can add custom models that comply with the OpenAI API scheme. Follow these steps to configure a custom model:
1. Navigate to "Settings" by selecting the gear icon on the top right corner of the sidebar
2. Select "Models" and you will find the section on "Custom Models" section
3. Click the "Add New Model" button to create a new custom model configuration
1. Enter the Model ID (e.g., `qwen2.5-coder-32b-instruct`, `deepseek-chat`)
2. Provide the Base URL for your model's API endpoint
3. Add your API Key for authentication
4. (Optional) Specify if the model supports image inputs
To run the DeepSeek V3 model:
* Model ID: `deepseek-chat`
* Base URL: `https://api.deepseek.com/v1`
* Enter your DeepSeek API Key in the provided field
Go back to the chat screen by clicking on the close icon on the top right
corner of the sidebar and you will see the custom model in the model
selection options.
## Running Local Models
Alex Sidebar supports running local AI models through Ollama, providing a free and privacy-focused alternative to cloud-based models. Here is an example of how to set up a local powerful model like Qwen2.5-Coder:
1. Install Ollama to manage and serve the local model
```bash theme={null}
# Pull the Qwen2.5-Coder model
ollama pull qwen2.5-coder:32b
# Start the Ollama server
ollama serve
```
Add a custom model with these settings:
* Model ID: `qwen2.5-coder:32b`
* Base URL: Your ollama URL + `/v1` (e.g., `http://localhost:1234/v1`)
Local models may run slower than cloud-based alternatives, especially on less
powerful hardware. Consider your performance requirements when choosing
between local and cloud models.
## Best Practices
• Use Claude 3.5 Sonnet or GPT-4 for complex architectural decisions\
• Claude 3.5 Haiku or GPT-4 Mini for quick code completions
• Start new chats for long conversations to maintain accuracy\
• Match model capabilities to task complexity
## Troubleshooting
If you encounter issues with model responses:
1. Check your API key configuration
2. Verify your internet connection
3. Ensure you're within the model's context limit
4. Try switching to a different model
5. Restart Alex Sidebar if issues persist
Need help? Join our [Discord community](https://discord.gg/T5zxfReEnd) for
support and tips from other developers.
You can add custom models that comply with the OpenAI API scheme. Follow these steps to configure a custom model:
1. Navigate to "Settings" by selecting the gear icon on the top right corner of the sidebar
2. Select "Models" and you will find the section on "Custom Models" section
3. Click the "Add New Model" button to create a new custom model configuration
1. Enter the Model ID (e.g., `qwen2.5-coder-32b-instruct`, `deepseek-chat`)
2. Provide the Base URL for your model's API endpoint
3. Add your API Key for authentication
4. (Optional) Specify if the model supports image inputs
To run the DeepSeek V3 model:
* Model ID: `deepseek-chat`
* Base URL: `https://api.deepseek.com/v1`
* Enter your DeepSeek API Key in the provided field
Go back to the chat screen by clicking on the close icon on the top right
corner of the sidebar and you will see the custom model in the model
selection options.
## Running Local Models
Alex Sidebar supports running local AI models through Ollama, providing a free and privacy-focused alternative to cloud-based models. Here is an example of how to set up a local powerful model like Qwen2.5-Coder:
1. Install Ollama to manage and serve the local model
```bash theme={null}
# Pull the Qwen2.5-Coder model
ollama pull qwen2.5-coder:32b
# Start the Ollama server
ollama serve
```
Add a custom model with these settings:
* Model ID: `qwen2.5-coder:32b`
* Base URL: Your ollama URL + `/v1` (e.g., `http://localhost:1234/v1`)
Local models may run slower than cloud-based alternatives, especially on less
powerful hardware. Consider your performance requirements when choosing
between local and cloud models.
## Best Practices
• Use Claude 3.5 Sonnet or GPT-4 for complex architectural decisions\
• Claude 3.5 Haiku or GPT-4 Mini for quick code completions
• Start new chats for long conversations to maintain accuracy\
• Match model capabilities to task complexity
## Troubleshooting
If you encounter issues with model responses:
1. Check your API key configuration
2. Verify your internet connection
3. Ensure you're within the model's context limit
4. Try switching to a different model
5. Restart Alex Sidebar if issues persist
Need help? Join our [Discord community](https://discord.gg/T5zxfReEnd) for
support and tips from other developers.